So... good puddle (curtains)....
And bad, get sucked in my vacuum type puddle.....
Upon investigating the reason for such tall beds, I found out that my mom had raised them herself with 2x4's! Can you believe it? I was excited because I thought this was something I could do myself! And way cheaper than buying a new bed....
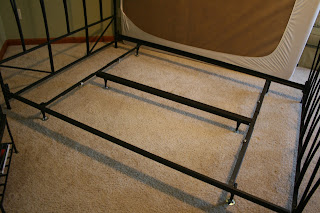
I started by stripping my bed frame of the mattress and box springs. (SIDE Note: If you are planning on purchasing box springs any time in the future, I HIGHLY recommend split box springs. So much easier to move!)
I headed to the home improvement store with my measurements. (I did call my 'go-to' handyman -Dad- to make sure I was headed in the right direction as far as wood goes.) Sometimes it's nice to get a 'yes that's right' from someone who knows how to do what you are trying to do. It could be a husband, or dad, or grandpa, or any one you know who usually has a pencil behind their ear.
I had 2x4's cut to my measurements. You'll like my new lingo... one 14-footer cut to make two 82 inch pieces and two 10-footers cut to make four 57 inch pieces. I bought the correct nails (12d 3 1/8"- and yes I had to look on the box to remember... and no, I couldn't tell you what it means.) I was a little anxious to head to the check out. I had never bought wood by myself and I was a little scared of the end cost. I was happy to learn there wasn't a fee for cutting.
The wood was cut, so it was mine. As the cashier scanned the bar codes, I was in shock. $2.89. $2.89, $3.89 (wood) and $2.39 (nails). I was hoping to keep this project under $30!!! Now what to do with the left over money???? :)
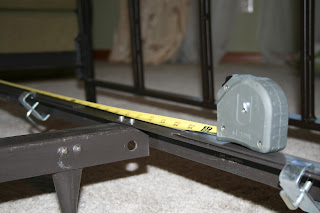
You know the phrase, "Measure TWICE, cut ONCE"? Well, I changed it to fit me... "Measure FIVE times before you haul your kids to the home improvement store, pick out wood, ask a ton of questions, have wood cut, load the wood into your car and then haul it in your house, without hitting the walls".
This is when you are expecting me to say the wood was cut to the wrong size... but it wasn't. I just didn't take into account the screws that would prevent the wood from fitting where I thought they would.
So, my handy help (husband) took the wood back and had an inch cut off so it would all fit.
I layed it all out to make sure it was lined up correctly and then penciled where the wood was to be nailed.
Then comes the hammering, and hammering....and hammering... and hammering.....
Ok, it wasn't as bad as I thought. In fact, since I knew the wood was the correct length I was excited to hammer because it meant I was close to finishing!
My method of holding the wood (with my knees) and hammering at the same time. Professional? No. But it worked for me!
All nailed and in place....
Load the box spring on, mattress, re-make your bed...
Will I sleep better because of this project? Probably not. But, when I 'climb into bed' tonight, I'll more than likely be dreaming about new bedding and new tall night stands to go with my 'new' bed. :)


Great post! I'm very impressed with you getting the wood all by yourself. I have so many wood projects that I'd love to do, but fear of messing up if I try it on my own keeps me from attempting it. You've inspired me :)
ReplyDelete