Pages

Showing posts with label Kid Craft. Show all posts

Tuesday, February 25, 2014

Celebrating the 2014 Olympics

I love the Olympics. Winter. Summer. It doesn't matter, I love them. 
There are some events that aren't as exciting of others, of course. {But I'll watch any of it.}

In preparation for the beginning of the Olympics a few weeks ago, I wanted to get the kids excited about watching the games.

Opening night, we had an Olympic mini-party.
We talked about the 'Olympic symbol' and made our own Olympic symbol flags with card stock, empty toilet paper rolls and paint. 

Did you know all the countries that compete in the Olympics have at least one of the 6 colors of the Olympic symbol (Blue, Black, Red, Yellow, Green, and White) in their flags?


Time to feed my Olympians!
(My Olympic ring colors were a little off. I couldn't think of anything blue that would be tasty.)


  Torches for all the athletes to carry....

 And of course, Gold Medals for all the winners!

The torches were a hit, and it quickly became apparent that my 4 year old was Olympic deprived.


We held our own little 'Olympic' games. All easy, Minute To Win It type games.
Moving an Oreo from your forehead to your mouth without dropping it, racing to pick up marshmallows with chopsticks, etc.


Watching the Opening Night of the Olympics, we learned one important thing:
Record the games so the kids can watch them the next day.
They were soooo excited about watching the torch light up, but someone couldn't stay awake long enough...

Joel and I stayed up late every night watching Primetime Olympics. Then I would watch it again the next day with the kids (fast forwarding to the good parts for them). Some days we could watch Olympics all day!
#olympicjunkie


And last night, we grabbed our torches to watch the closing ceremonies!


Looking forward to the Summer Olympics in 2016!
Until then, we will try to talk the kids out of snowboarding and ice skating lessons!

Friday, July 26, 2013

A Daddy Gift


Like most kids, Reese and Graham LOVE to draw and color pictures.
The only requirement is that you keep EVERYTHING they give you.

I thought this photo was funny....
Not entirely true, but it emphasizes the fact of how wrong it is to throw away ANYTHING (in the eyes of children.)

My kids learn quick that Mommy throws out stuff.
When crafting with their friends, they even talk about how guests need to not leave the newly crafted junk treasures on the floor. "My Mom will throw it out" is what they say.
Guilty.
I'm sorry... Mommy can't handle papers just lying around. If I did, I would have died years ago from paper strangulation.

Anyway.... with that said, they give Daddy TONS of pretty artwork. And Daddy takes it to work.
In an attempt to keep those papers organized and help them remain a keepsake, enter the organizer we got him for his birthday.


It's a plastic box that holds file folders perfectly.
And each file folder is now labeled with a year. I started with 2005, the year our oldest was born, and ended with 2029. That's a lot of keepsakes!

So this plastic file box doesn't get confused with 'work' stuff, I added this poem to the front:

"Paint me a picture,
Both happy and bright;
That will light up my face
Both day and night!
Paint me a world of make believe...
Of princesses, dragons, and knights on steed!
And when you are finished,
I know just what to do!
I'll save those precious pictures,
And one day, show them all to you!"


It is already holding precious gifts of paper from our kids to Daddy.
It will be fun to see them go through the files, piece by piece, when they're older and see what they drew from years past.

I'm thinking of making one for me. I find myself getting jealous that Daddy is getting all of the artwork.  The purger in me does love those precious drawings and pictures when they have a place!

Wednesday, February 1, 2012

Reindeer Thank Yous

It's February, which means I always have my Christmas
Thank-You cards in the mail before February.
(Well, usually.)
I'm a little late, but they are made, written and ready to mail today!

I think the art of a hand written note is, sadly, loosing it's importance in our society today. I guess I could be considered 'old-fashioned' on this subject. I think a great, written, 'Thank You' note will be cherished by the reader. 
After all, they took the time to be deserving of a Thank-You, so I want to take time and show my appreciation with meaningful words.

This year I saw some cute reindeer cards on Pinterest. I didn't read the How-To tutorial but, by the picture, it's pretty self-explanatory.

Here's What You'll Need:
(also black squirt paint, not pictured)

Here's How:
1. Using the brown ink, stamp each thumb of your family.
The order we went: Reese, Me, Daddy, Graham.

2. Then I added noses with the squeeze paint. Black for me and the kids and red for Daddy (Rudolph).

3. Then using the same squeeze paint I dotted on eyes.
When all the paint was dry, I drew antlers on top of the reindeer.

4. Then spend a little time expressing your thankfulness!

Tuesday, December 20, 2011

Fun and Easy Kid Gift Craft...

Can your child use a hole puncher? Can he or she glue?
Well than, they can make these! (With Mommy's help...)

I had these super cute mini brown bags (perfect size for wrapping gift cards).
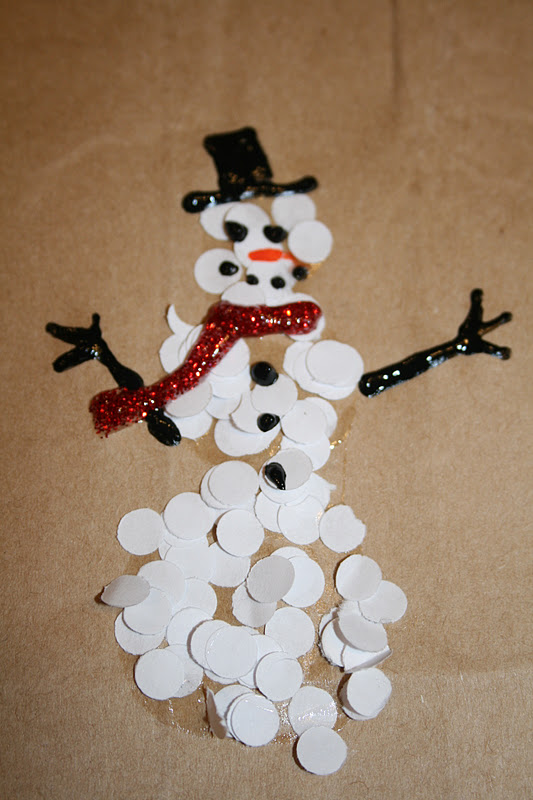
They were cute but boring. Enter scrap paper and a hole puncher!
(She punched and glued and I added the paint.)

Snowman

Oh Christmas Tree, Oh Christmas Tree...

Or add some ribbon....

Friday, November 18, 2011

Friday Fun- Turkey Cups

Turkey cups will be a fun addition to any Thanksgiving table!

I combined a few ideas I recently saw and here's what fun the kids and I came up with on this Fun Friday...

What You'll Need:
Scissors (the Mommy and the kid kind)
Pencil
Googly Eyes
Disposable Cups
Glue
Scrap paper


Here's How:
1.Trace


2. Cut
In addition to cutting the turkey hand feathers, you will need a yellow beak, a red gizzard, and a brown circle just big enough to hold the turkey face.

3. Glue
(Oh yeah, this is were I regretted doing this little project in the living room....)
You're probably thinking it was one of the little helping hands that did this, but no. It was the Mommy squeezing a little too hard on the glue bottle. Table, floor, couch and more...

Clean up and back to gluing...

And wha-la!
Turkey cups! We'll be using ours for snacks...

Wednesday, October 26, 2011

31 Days of Things I've Been Wanting to Do, Day 26: Jar-O-Lanterns (Re-Post)


What You'll Need:
Glass jars (jars used in canning or saved jars from jelly, pickles, etc.)
Orange Paint
Brown Paint
Paint Brush
Painters tape
Surface preparations (trash bags work great for this)
Ribbon, straw decoration, etc.
Tea light candles

Here's How:
1. Prepare painting surface and painter. :)


2. Tape faces on the jars, using the painters tape, cut to desired shapes.

3. Ready, Set, Paint! (our favorite part)
Paint over the tape and around the jar, saving the top to be painted brown after the orange paint has dried.

4. When jars are dry, carefully remove tape.

5. Decorate with ribbon (optional, of course).
 Add a tea light, light it, and enjoy your 'Jar-O-Lantern',
guaranteed never to rot.

Wednesday, September 28, 2011

Jar-O-Lanterns


What You'll Need:
Glass jars (jars used in canning or saved jars from jelly, pickles, etc.)
Orange Paint
Brown Paint
Paint Brush
Painters tape
Surface preparations (trash bags work great for this)
Ribbon, straw decoration, etc.
Tea light candles

Here's How:
1. Prepare painting surface and painter. :)


2. Tape faces on the jars, using the painters tape, cut to desired shapes.

3. Ready, Set, Paint! (our favorite part)
Paint over the tape and around the jar, saving the top to be painted brown after the orange paint has dried.

4. When jars are dry, carefully remove tape.

5. Decorate with ribbon (optional, of course).
 Add a tea light, light it, and enjoy your 'Jar-O-Lantern',
guaranteed never to rot.