

If you are removing 100 THINGS with me, I wanted to help encourage the purging process.
(If you missed that challenge, read HERE.)
Three simple words to remember... LOVE, NEED, USE.
Let me explain...
LOVE- Ask yourself, "Do I love this?".
If your answer is "No, I do not love this." Then why keep it? Now, I don't mean it has to be a shirt you love so much that you wear if every other day. But, if it's something you don't really like, or maybe that cute summer dress that doesn't really like you, then why allow it to hang in your closet or sit on your shelves only to take up precious space?
NEED- Ask yourself, "Do I need this?"
In my personal 100 ITEM purge, I asked myself, "Do I really need 18 pairs of jeans?" Obviously, no. It sounds ridiculous that I even had 18 pairs of denim!
USE- Ask yourself, "Have I worn/used this in the last year?"
A year is a long time! 365 opportunities and if that faded red sweater didn't make the cut this year, chances are, you're not going to wear it next winter!
Or what about that crock pot? No, not your two newer ones but the 5th one that you inherited or that was given to you as a gift? Ask yourself if you really need 5 crock pots.
Happy purging!
Wednesday, February 29, 2012
Monday, February 27, 2012
100 Things
I recently read a story about a woman that removes 100 items from her home every year or so.
"So once a year, and sometimes twice if I feel the house is getting cluttered, I do a “100 Things” project on a weekend.
It’s quite simple: I must find 100 things to get rid of in some way."
This came at a great time for me. Remember one of my New Year's goals was to clean out the upstairs hall closet and make it a toy closet? I was in the midst of taking our off-season clothes from the hall closet and putting them in our bedroom closet. (Along with the current season clothes.)

There is a severe problem reason that we needed two closets for clothes. Too MANY!
For years we had put our off-season clothes in huge containers. Twice a year, I would pack up the off-season clothes, my husband would carry the HUGE containers to the basement, bring up the stored clothes and I would un-pack them.
(shew.... exhausting just thinking about doing that 2 times a year!)
Then I decided to keep them hung, in the hall closet, for easier switching during season change. Yes, that was a good idea, in terms of ease of transportation, but it also allowed us the 'freedom' to keep and purchase even more clothes.
So, here comes the part that I have been feeling soooo overwhelmed with STUFF.
I feel this way anytime I visit my basement, too.
My desire is to live life minimally. I have tried to slim down 'things' in general.
Realizing what we do have, rather than complaining about what we don't is humbling and satisfying. And it brings on a heart of giving- more on that another day!
So, my solution to minimizing my closet.... (drum-roll please)....
we are getting rid of 100 THINGS just in our closet! Ta-da!

It doesn't seem that hard right? RIGHT! That's what I thought!! So, you'll do it with me????
You may not have a busting-at-the-seems-closet like me, but maybe you can collect 100 THINGS somewhere else. Or in your entire home combined?
As you go about your daily business today, take a look around at all that you have been blessed with and see if you can spot some things that are cluttering your potential to organization!
Then, if you decide to join me, take this week and search for the items you'd like to remove. Keep a tally so you know when you've reached 100 THINGS.
A week from today, I'll report on my 100 THINGS to get rid of and we'll see how I did!
"So once a year, and sometimes twice if I feel the house is getting cluttered, I do a “100 Things” project on a weekend.
It’s quite simple: I must find 100 things to get rid of in some way."
This came at a great time for me. Remember one of my New Year's goals was to clean out the upstairs hall closet and make it a toy closet? I was in the midst of taking our off-season clothes from the hall closet and putting them in our bedroom closet. (Along with the current season clothes.)

(This is our upstairs hall closet)
For years we had put our off-season clothes in huge containers. Twice a year, I would pack up the off-season clothes, my husband would carry the HUGE containers to the basement, bring up the stored clothes and I would un-pack them.
(shew.... exhausting just thinking about doing that 2 times a year!)
Then I decided to keep them hung, in the hall closet, for easier switching during season change. Yes, that was a good idea, in terms of ease of transportation, but it also allowed us the 'freedom' to keep and purchase even more clothes.
So, here comes the part that I have been feeling soooo overwhelmed with STUFF.
I feel this way anytime I visit my basement, too.
My desire is to live life minimally. I have tried to slim down 'things' in general.
Realizing what we do have, rather than complaining about what we don't is humbling and satisfying. And it brings on a heart of giving- more on that another day!
So, my solution to minimizing my closet.... (drum-roll please)....
we are getting rid of 100 THINGS just in our closet! Ta-da!

(Here's one side of our closet- with just the current season clothes)
You may not have a busting-at-the-seems-closet like me, but maybe you can collect 100 THINGS somewhere else. Or in your entire home combined?
As you go about your daily business today, take a look around at all that you have been blessed with and see if you can spot some things that are cluttering your potential to organization!
Then, if you decide to join me, take this week and search for the items you'd like to remove. Keep a tally so you know when you've reached 100 THINGS.
A week from today, I'll report on my 100 THINGS to get rid of and we'll see how I did!
Friday, February 24, 2012
Spirit Week
We've got spirit, YES we do!
We've got spirit, how about YOU?
(High School cheerleading flash-back there.)
Spirit Week 2012
Clash Day


Nerd Day

Storybook Character Day

Around the World Day

School Colors Day


We've got spirit, how about YOU?
(High School cheerleading flash-back there.)
Spirit Week 2012
Clash Day


(She's definitely not short on accessories!)

Reese won first place in her class for 'Best Nerd'!

(Rapunzel)

(Authentic German outfit)


(Not to be left out. He posed himself!)
Wrapping up Spirit Week with the Homecoming Basketball Game...

(The Big Cheerleaders let the little ones cheer with them.
This made my little cheerleaders' day!
A BIG thanks to the BIG girls for including the cheerleader-want-to-bes!)

He's just oozing with spirit!
Go Lions!
Tuesday, February 21, 2012
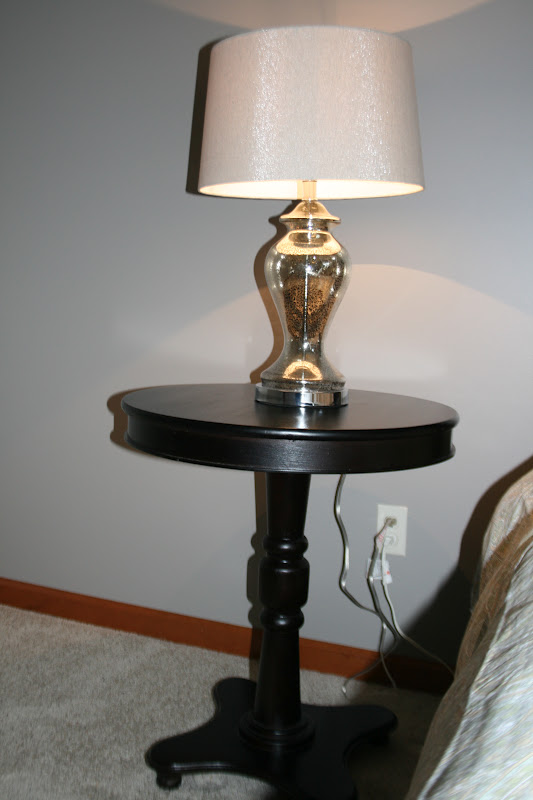
Bedroom Re-Do
This wasn't a COMPLETE (as in walls removed, reconstruction, etc.) bedroom re-do, but it is definietly a change.
I scored a great deal on bedding that I've had my eye on for quite some time.
Queen Duvet and 2 Pillow Shams- $29
2 Euro Pillows- $10 each
2 Accent Pillows- $26 together
(If you don't TJMaxx, you should!)

It started with bedding and moved on to paint...

I walked into our paint store armed with paint chip samples that I thought would be the perfect shade of gray.
Sample #1- too purple
The next trip to the same paint store, I mentioned that I never thought gray would be such a hard color to match. I got laughed at. Apparently I'm just figuring out what everyone else already knows about gray paint!
Sample #2- too baby blue-looking
The third trips' a charm right?!?!? At this point, the paint guy was probably anything but happy to see me. I got two samples this time.
My daughter even said , "I hope this paint looks good so we can stop coming here!"
And third time is a charm!
Sample #3- Accent wall
Sample #4- Surrounding walls
 Hooray! Now I can actually start painting rather than just the test spots.
Here's the BEFORE (with some test spots painted)


I scored a great deal on bedding that I've had my eye on for quite some time.
Queen Duvet and 2 Pillow Shams- $29
2 Euro Pillows- $10 each
2 Accent Pillows- $26 together
(If you don't TJMaxx, you should!)


Sample #1- too purple
The next trip to the same paint store, I mentioned that I never thought gray would be such a hard color to match. I got laughed at. Apparently I'm just figuring out what everyone else already knows about gray paint!
Sample #2- too baby blue-looking
The third trips' a charm right?!?!? At this point, the paint guy was probably anything but happy to see me. I got two samples this time.
My daughter even said , "I hope this paint looks good so we can stop coming here!"
And third time is a charm!
Sample #3- Accent wall
Sample #4- Surrounding walls

Here's the BEFORE (with some test spots painted)


I paint test spots on every wall because the color may look different on every wall.
Leave your test spots up for at least 24 hours. That way you can see it during different times of the day, depending on the lighting.
Next, fill any holes that you may have from pictures, curtains, etc.

Tape areas that you are not comfortable 'cutting in' . (Painting term for painting the edges, free handed.)
I can't cut-in to the left of molding because I am right handed. I have also found it easier to tape the base molding. That way, you don't have to lay on the floor to paint. It also prevents little specks of paint landing on your molding when you are painting with the roller.

Move all furniture to the middle of the room...

(I was waaaayyyy into painting to take any decent 'during' pictures.)
AFTER......


I'm planning on getting crisp, white (simple) panels made for the windows.
I'm going to add ribbon accents to match one of my accent pillows...

The bed skirt was free (taken from my daughter's room... her before and after will hopefully appear around here next week.)

I love the hotel feeling...
Speaking of accents, I chose the wall behind the bed to be a darker color to 'frame' the bed.

I see a white shelf above the bed....
The decor part is what isn't finished.
I'll post more pictures as it gets fully completed.
It took us almost 8 years of marriage to get nice, matching night stands.
I wonder how long until I can get a real dresser????
Monday, February 20, 2012
2012 Goals
Well, February is quickly coming to an end.
Remember back around January 1st when you made
commitments, goals and promises???
Are you hanging in there?
If you remember my goals, they included: drinking water, flossing, basement clean-out, and more...(Read them here.)
I've spent one good day down in the basement. Brace yourselves.
I wouldn't show these pictures to just anyone!

(A view from the stairs- BEFORE)

(A view from the basement- BEFORE)
This is years of "Honey, will you take this to the basement?"
And then me not going down to put the stuff away.

(And the view a few hours later. NOT finished, by any means, but at least now I have a walking path!)
Apparently, I have this thing against throwing away boxes....

And I have a thing for on-line shopping (hence the boxes), that was not new news.
I have been
I have more energy and I feel better in the mornings.

I started out flossing everyday. But, that has slipped to once a week now. :/
My husband just asked me to buy him floss. He wants to floss like me. So, I guess I will be starting that back up! :)
I've spent lots of individual time with my kids.
Haven't made it to the library, yet...
but I am reading a book that I am loving!
My So-Called Life as a Proverbs 31 Wife
by Sara Horn
(Read about it here.)
How are you doing on your goals for 2012? You have 10 more months!
Friday, February 17, 2012
Kid Room Fixes
You know those annoying-type projects? The ones that are on your to-do list f-o-r-e-v-e-r?
I had a few of those annoying things on my list.
So, before they turned into 'forever' on the list, I got it done.

#1
Broken Dresser Drawer
'Cause I'm not the only one that has a 2-year-old that deems is necessary to get into the drawer to get something out of the drawer, right????
When he came down the stairs saying, "Broke." I knew that wasn't good!

Broke was right! The white drawer front was broken off of the actual drawer.
Thank goodness for Gorilla Wood Glue and a few tiny nails.
(The paint can on top was my 'weight' on the drawer as it dried- professional, I know!)

#2
Sagging Bed Skirt
We don't have little Buddy's bed up too high so if he falls out, he doesn't have that far to go.
I decided to pin the excess fabric so that no matter how much his mattress moves around, the bed skirt will stay put because it is now pinned to the perfect length.

(fold and pin is all I did here)


#3
Wall Banging
No, not the head or the toy kind. I'm talking about when little Buddy jumps into bed (or is thrown into bed by Daddy) that bang you hear when the headboard hits the wall.
Then Mommy cringes knowing a paint touch might be in order.
My solution- carpet.
(I need to preface here- this is TOTALLY an idea that came from my brilliant mom!)
If you have carpet scraps, do this!

I cut pieces of carpet scraps and nailed a piece on each side of the back of the headboard. Now only quiet banging occurs! :)
What's on your to-do list that you can get done this weekend?
Do it before it turns into f-o-r-e-v-e-r!
Thursday, February 16, 2012
Valentine Recipes
Chicken Bruschetta Skillet
 This was the first time I made this, but certainly not the last!
It's an easy, delicious meal that is sure to become a great, go-to, weekday meal!
What You'll Need:
1 can diced, Italian tomatoes, drained
1/2 cup shredded Italian cheese, plus more for topping
3-4 boneless chicken breasts
1 can (8oz.) tomato sauce
1 clove garlic, minced
Here's How:
1. Pound chicken until even in thickness. Slightly brown over medium heat in a buttered, hot skillet.
2. Remove chicken and add tomato sauce and garlic to the pan. Return chicken to the skillet. Top the chicken with the can of drained, diced tomatoes and the cheese.

 The original recipe called for crushed croutons at the end. I had intentions of this, but honestly forgot. You can see the original recipe here.
Old-Fashioned Chocolate Cake

Here's What You'll Need:
Cake:
3 cups all-purpose flour
2 cups sugar
1/2 cup unsweetened cocoa powder
2 tsp. baking soda
1 tsp. salt
2 cups hot water
3/4 cup vegetable oil
2 Tbs. distilled white vinegar
1 Tbs. instant coffee granules
1 Tbs. vanilla extract
Icing:
1 stick butter
1 1/2 cups sugar
1 1/4 cups unsweetened cocoa powder
1 1/4 cups heavy whipping cream
1/4 cup sour cream
1 tsp. instant coffee granules
2 tsp. vanilla extract
Here's How:
Cake:
1. Pre-heat oven to 350* with the rack in the center. Spray two 8x2 inch round cake pans with nonstick spray.
2. Whisk together flour, sugar, cocoa, baking soda and salt in a large bowl.


 (And yes, I need not let you know how D-E-L-I-C-I-O-U-S this was. Just look at the picture.)
I pretty much followed the recipe step-by-step but the original recipe is found here. I spotted it in a free Cuisine At Home magazine I received in the mail.

It's an easy, delicious meal that is sure to become a great, go-to, weekday meal!
What You'll Need:
1 can diced, Italian tomatoes, drained
1/2 cup shredded Italian cheese, plus more for topping
3-4 boneless chicken breasts
1 can (8oz.) tomato sauce
1 clove garlic, minced
Here's How:
1. Pound chicken until even in thickness. Slightly brown over medium heat in a buttered, hot skillet.
2. Remove chicken and add tomato sauce and garlic to the pan. Return chicken to the skillet. Top the chicken with the can of drained, diced tomatoes and the cheese.

3. Bring to a boil. Simmer, covered for 15 minutes or until chicken is cooked through.
I topped mine with more cheese and served it with hot buttered noodles.

Old-Fashioned Chocolate Cake

Cake:
3 cups all-purpose flour
2 cups sugar
1/2 cup unsweetened cocoa powder
2 tsp. baking soda
1 tsp. salt
2 cups hot water
3/4 cup vegetable oil
2 Tbs. distilled white vinegar
1 Tbs. instant coffee granules
1 Tbs. vanilla extract
Icing:
1 stick butter
1 1/2 cups sugar
1 1/4 cups unsweetened cocoa powder
1 1/4 cups heavy whipping cream
1/4 cup sour cream
1 tsp. instant coffee granules
2 tsp. vanilla extract
Here's How:
Cake:
1. Pre-heat oven to 350* with the rack in the center. Spray two 8x2 inch round cake pans with nonstick spray.
2. Whisk together flour, sugar, cocoa, baking soda and salt in a large bowl.

3. Combine water, coffee, oil, vinegar and vanilla in a large measuring cup.

4. Add coffee liquid to the dry ingredients and whisk until just combined. Divide batter between pans, then bake until a toothpick inserted in the center comes out clean, 35-40 minutes.
5. Cool cakes on a rack for 15 minutes, then invert them onto the rack. Leave the cakes upside down to cool completely.
Icing:
1. Melt butter in a large saucepan over medium heat.

2. Stir in sugar and cocoa. Mixture will be thick and grainy.
3. Combine heavy cream, sour cream, and coffee into a large measuring cup. Mix until smooth.
4. Gradually add cream mixture to chocolate until blended and smooth. Cook until the sugar has dissolved and the mixture is smooth and hot to the touch, 6-8 minutes. Do not boil.
5. Off the heat, add vanilla. Cool icing at room temperature until spreadable, 2-3 hours.
Ice your cake and eat it too!

I pretty much followed the recipe step-by-step but the original recipe is found here. I spotted it in a free Cuisine At Home magazine I received in the mail.
Wednesday, February 15, 2012
XOXOXO
I hope you had a great Valentine's Day!
We sure did, but then again, every day is filled with
L-O-V-E
around here!
Here's a sneak peek...
So I have been pinning left and right these GREAT ideas for cute, DIY Valentines for Reese to hand out at school. We took a little trip to Wal-Mart to get the supplies I needed to make them. Well, of course, the Valentine section is hard to miss. We ended up walking through and this is the face I saw as she spotted Rapunzel Valentine's...


And from my first LOVE....

We sure did, but then again, every day is filled with
L-O-V-E
around here!
Here's a sneak peek...
So I have been pinning left and right these GREAT ideas for cute, DIY Valentines for Reese to hand out at school. We took a little trip to Wal-Mart to get the supplies I needed to make them. Well, of course, the Valentine section is hard to miss. We ended up walking through and this is the face I saw as she spotted Rapunzel Valentine's...

(I had her reenact the 'face')
Could you say "No." ?
Well, I didn't. The thing she wanted most only cost $2.47. My supplies were going to be 3 x that!
Sometimes, even though you have great ideas, it's better to go the easy route!
Valentine's Day Morning...
She was busting at the seems to give me my Valentine.
A metal heart hook.

How adorable, right??
My husband has an uncle that has a forging hobby. She saw a picture WEEKS ago of a heart, that he had made, and asked if he would make one for her (to give to ME)!
PRECIOUS! And to think she kept that secret all this time!!!
Breakfast with the Little Love....
Heart toast and bananas.

And lunch...
HEART PB&J.

We spent the afternoon playing and crafting with some friends.
We made Valentine Bookmarks out of paint samples.


Valentine Dinner....
Chicken Bruschetta Skillet

And we finished off dinner with dessert.
Chocolate Cake (of course)

Then PRESENTS!


(He's so sweet to me.)
XOXOXO
Subscribe to:
Posts (Atom)